ALUMINUM BLADE INFORMATION
For live stage combat (as opposed to film where the sounds effects will all be added in post production), its important that an aluminum sword rings when its struck against another aluminum blade. To achieve a good ring the hilt must be under compression, allowing the blade to vibrate cleanly and clearly. If there are loose components they absorb the vibrations and the blades just go "clack". No one wants a sword that goes "clack"....
There are several different methods I use to create clear-ringing aluminum-bladed swords. Each technique has its pros and cons, and I use different methods for different projects.
Five different methods are outlined below:
Method #1 -- Direct Threading
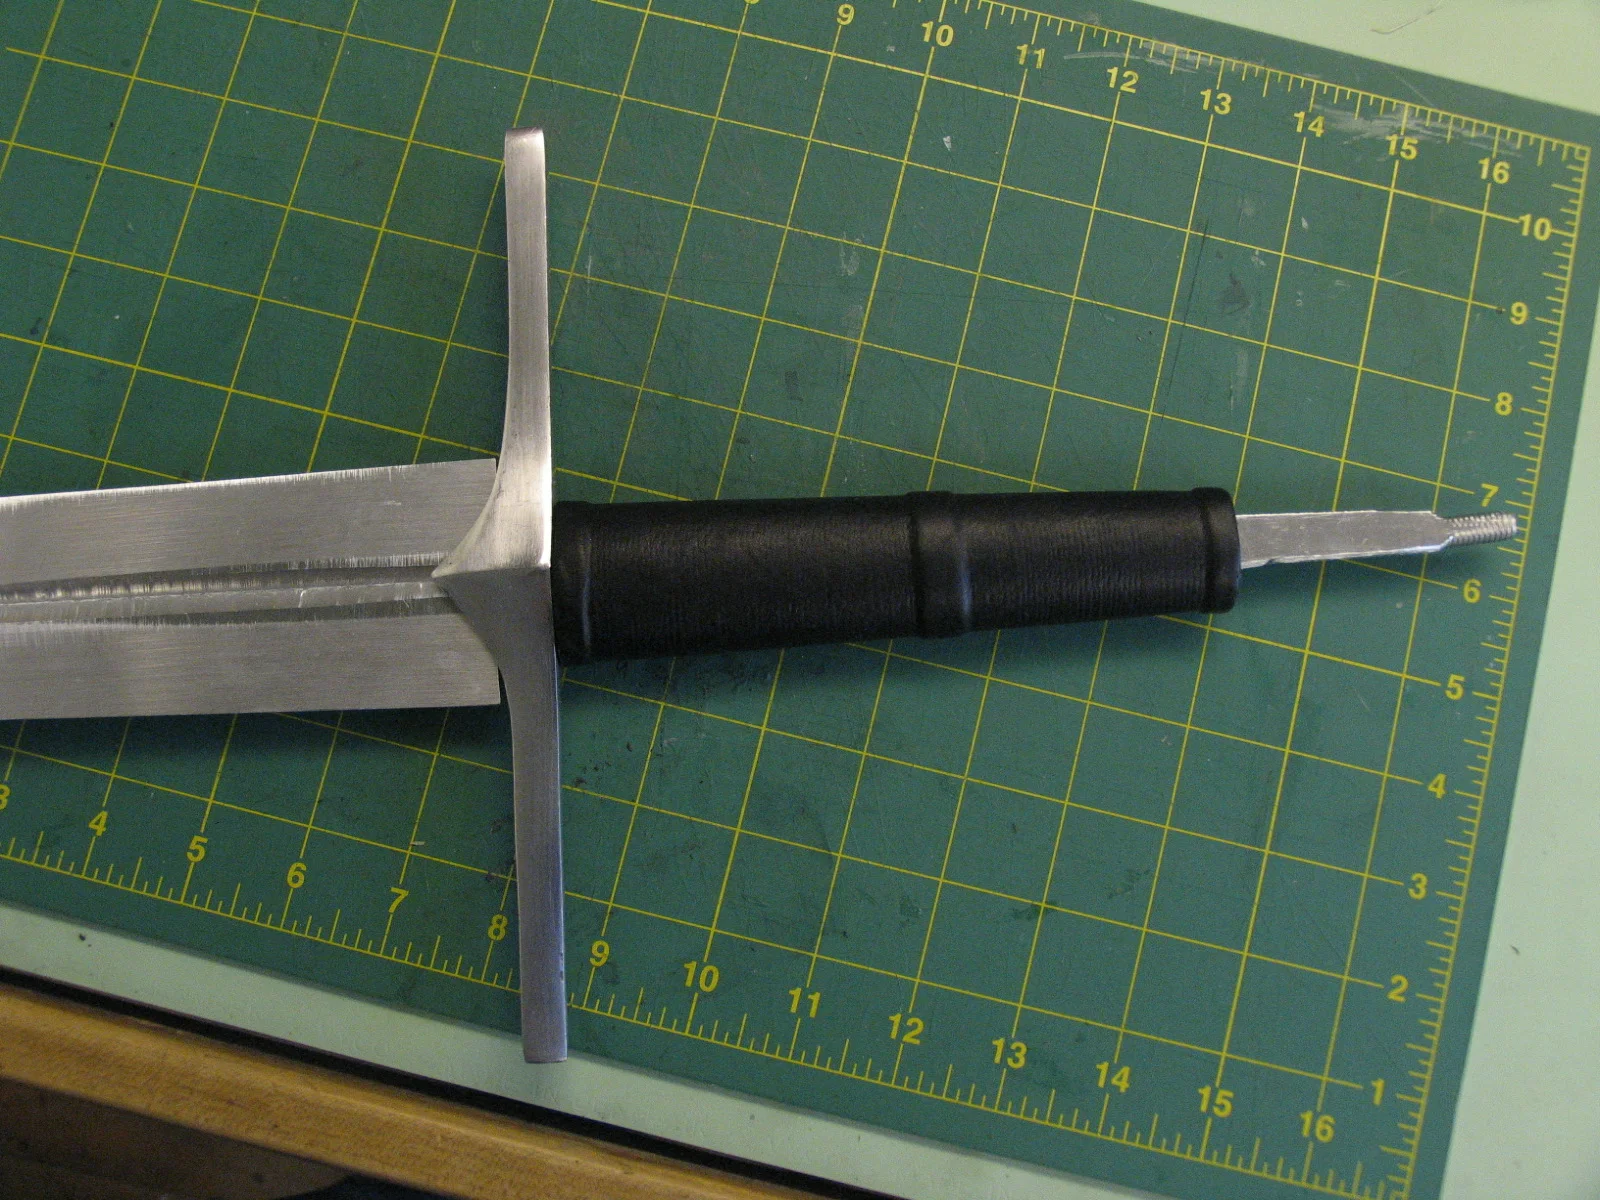
With direct threading, the end of the aluminum tang is reduced to the correct width, rounded, and then threaded with a normal threading die....typically with 1/4" aluminum I use a 5/16-18 thread. The steel pommel can then screw right on.
The upside of this method is that it's pretty quick, and the threaded tang is the same thickness as the rest of the tang (unlike Method #4)
The downside is that you are screwing steel threads onto aluminum ones, and because the steel is much harder than the aluminum its possible strip the threads if you aren't careful. A second downside is that you are supporting the weight of the pommel on a relatively small cross section of aluminum, which makes it more prone to breakage.
As such, I believe direct threading is best for blades with relatively small pommels (rapiers, daggers, etc) where the tang does not have to support a great deal of pommel weight. It's also good for weapons with simple pommel caps, like cutlasses.
Method #2 - Direct Threading + Recessed Nut
This is a technique I don't often use anymore....in this method, the very end of the aluminum tang is threaded 5/16-18, which meets a recessed allen nut to secure the hilt. The pommel needs to be slotted so that it sits on a wider rectangular cross section below the threading. Once gain, the torque/weight of the pommel is supported by the wider rectangular section, while the compression is handled by the nut. This is essentially the same as Method #1, but modified for use with heavier wheel pommels.
The downside here is that the threaded connection is steel-on-aluminum, and thus susceptible to stripping. Also, 5/16-18 recessed allen nuts have a fairly large diameter, so the pommel has to be wide enough to accommodate the receiving hole. The nuts I can get also aren't that long, so all the torque you put on the allen nut is on a fairly short section of threading.
I have made many swords with this method and haven't hear of any breaks thus far. Nevertheless, I've moved away from this method for wheel pommels in favor of Method #3, which provides a steel-on-steel threaded joint that is less susceptible to stripping due to over-enthusiastic tightening.
Method #3 -- Threaded Rod Insert
In this method, I use a lathe to drill a 5mm hole into the end of the 1/4" thick aluminum tang, usually 1.25-1.5 inches deep. This is tricky, and there is basically zero room for error, or you punch through one side of the aluminum.
Once the hole is drilled, the tang is braced with a steel clamp to prevent "punch out" through the thinnest part of the aluminum, and then threaded 6mm metric. I clean the hole with alcohol to remove the cutting oil used during threading and to clear any chips inside, then I screw a piece of steel 6x1mm threaded rod covered in JB weld into the end of the tang. I crank this way in there, and let the epoxy dry.
Now I have a piece of steel threaded rod secured in the aluminum tang. The pommel itself doesn't screw on to this threaded rod. 6mm rod is fine for rapier pommels, but too thin for broadsword pommels. The pommel wants to slot on to the wider (and sturdier) rectangular aluminum tang, and then a recessed allen nut is used to secure the hilt assembly.
I use this method primarily on swords with wheel-shaped pommels. Those pommels can't be screwed on because they need to maintain an exact orientation with the edge of the blade. It can also be used with round pommels, but they have to be made to "index" or slot on to the aluminum tang so they don't spin.
The pros of this method are that the weight and torque of the pommel is supported by a large (unthreaded) rectangular cross section of aluminum, while the compression is taken care of by a steel-to-steel threaded connection which won't strip. It also doesn't require any extra clearance (again, unlike Method #4)
The cons are that it's tricky to do and requires a lot of steps....drilling, cleaning, epoxying, etc., and then the pommel has to be drilled to receive the recessed nut. Otherwise, it seems to be very sturdy. Even when the threading punches through the skin of the aluminum tang, my own destructive tests show that the threaded steel rod will bend and then break before the aluminum will give.
Method #4 -- Pinned Tang Attachment
This method I definitely did not invent, but instead stole wholeheartedly from other skilled aluminum swordmakers.
There are different ways to manufacture the attachment itself, but the long and short of it is that a steel threaded tang is attached to the aluminum with steel pins that can be riveted (or not) to secure it in place.
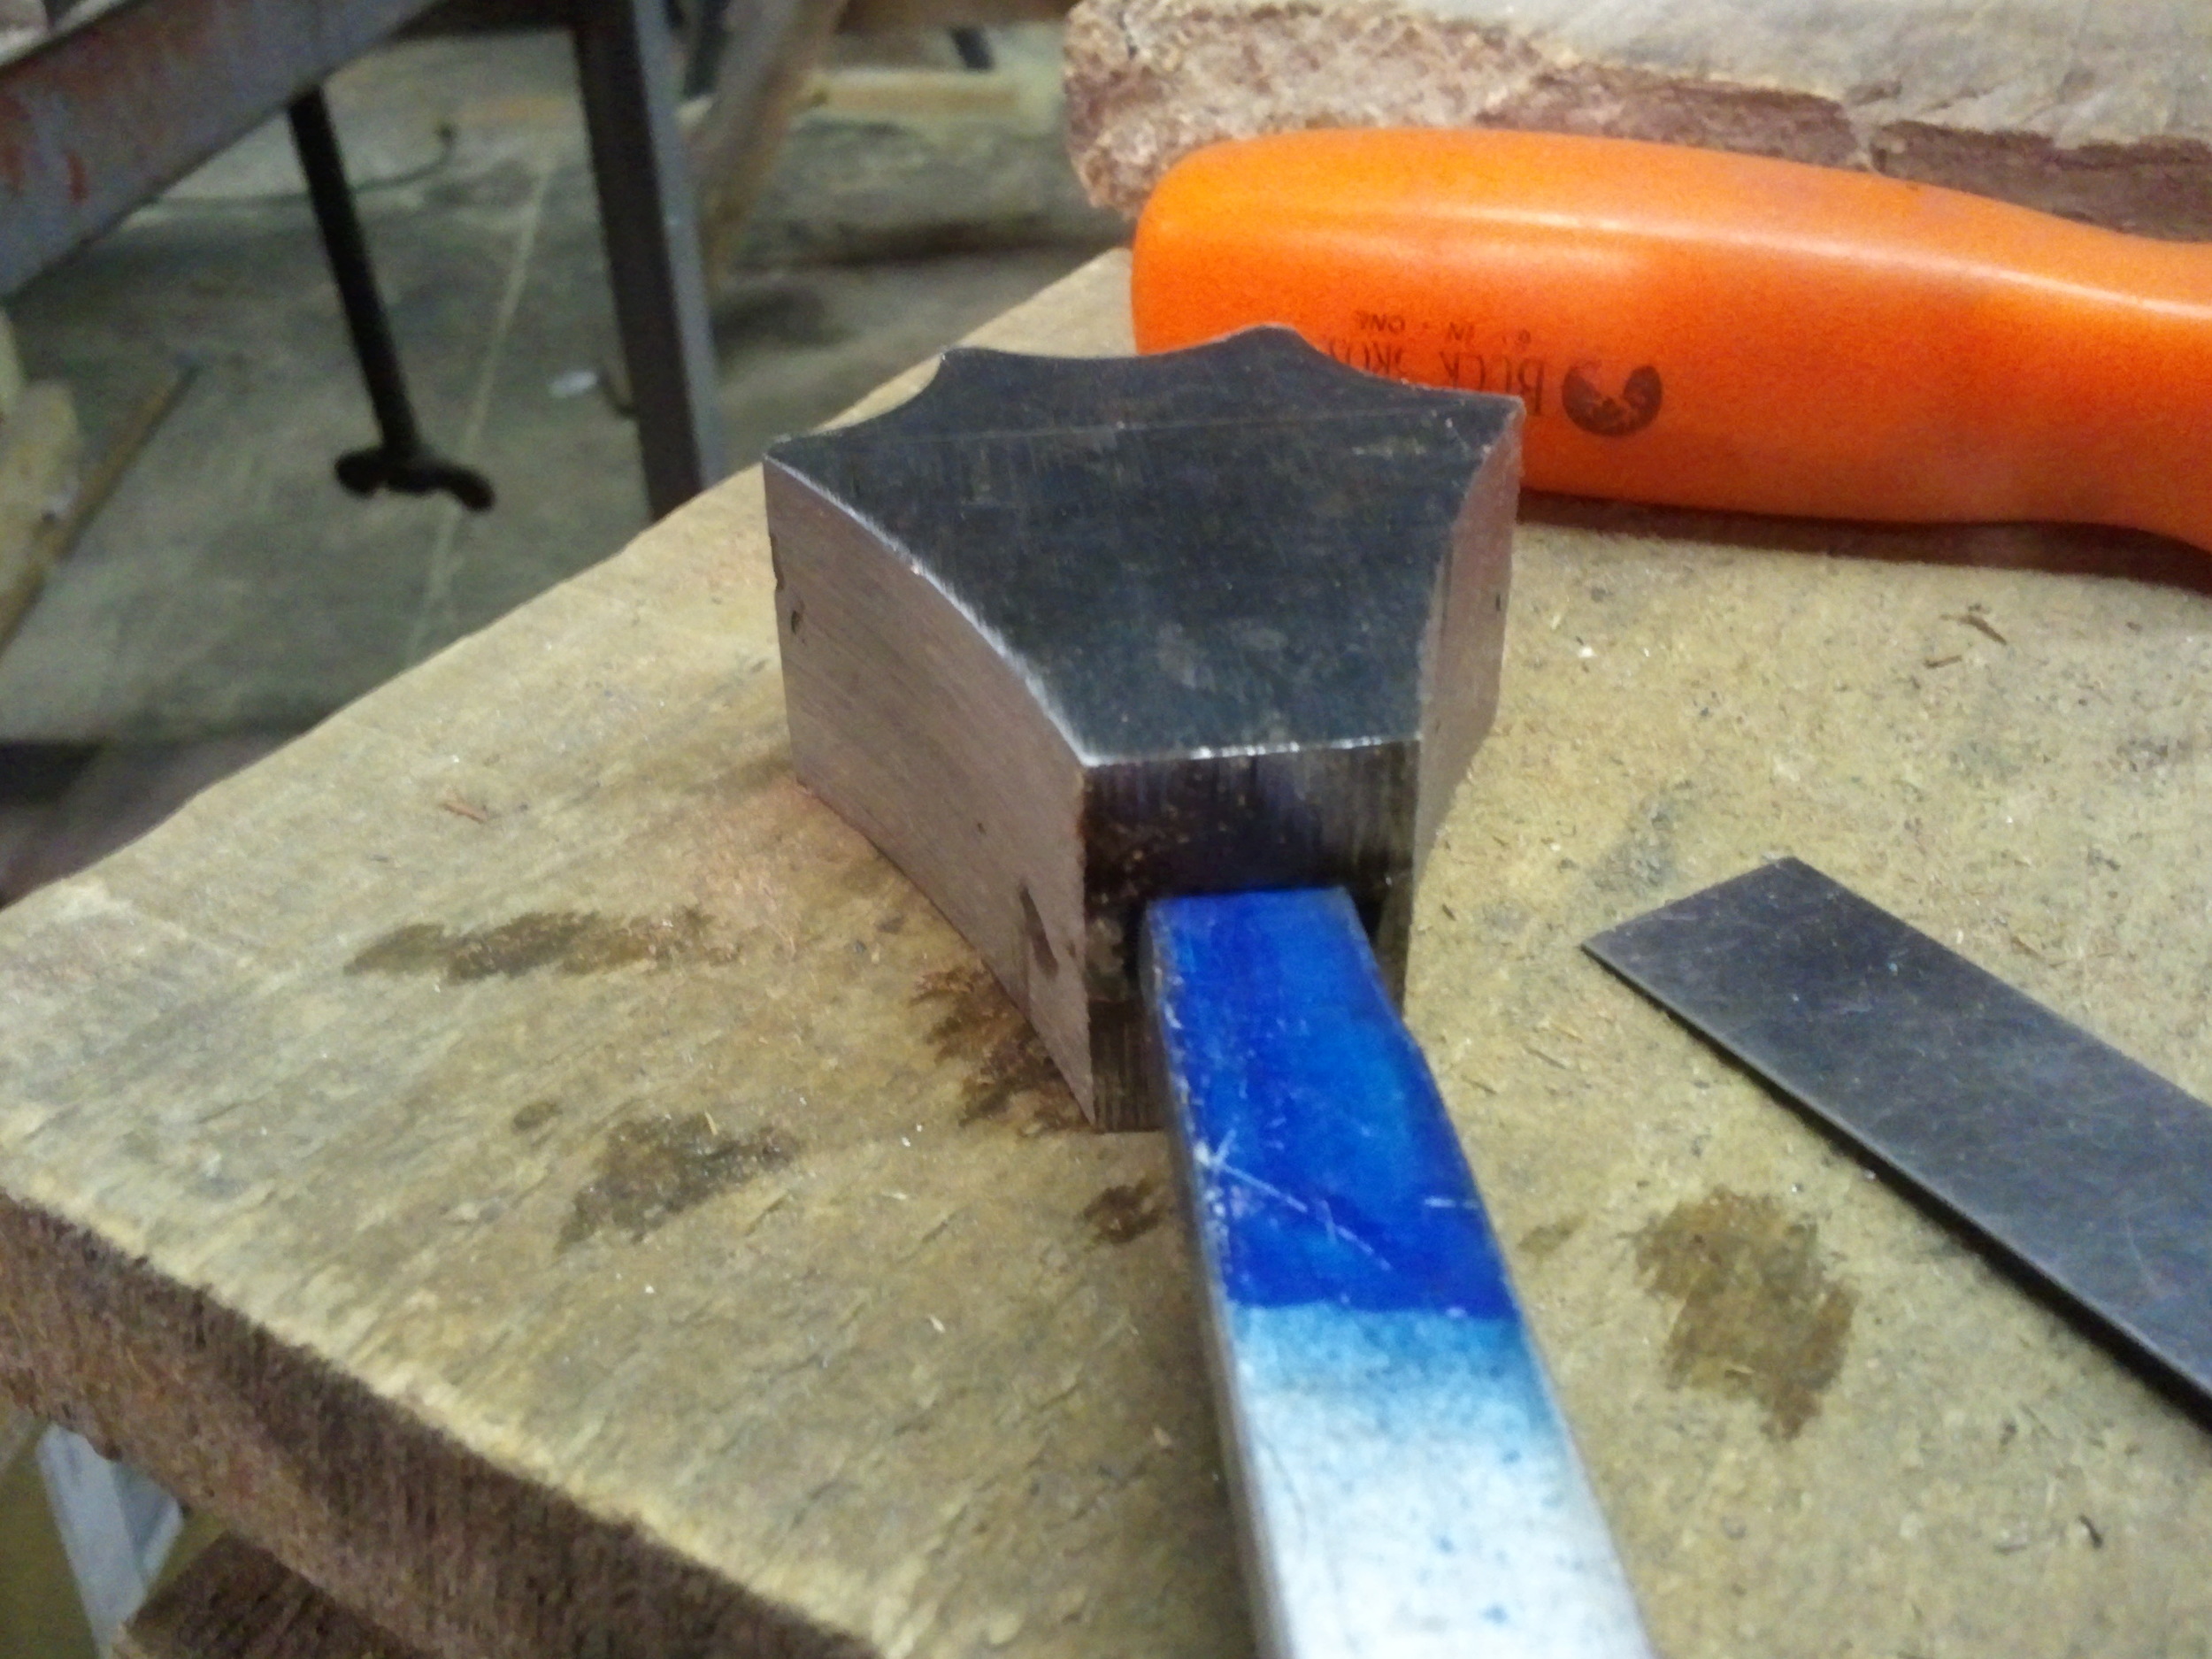
In most of these pictures you are seeing a 1/2" diameter steel rod with a 1/4" slot cut in it. That slips over the tang, and then 3 3/32" holes are drilled through and filled with 3/32 stainless steel rod, which is then peened in place. The other end of the steel rod is threaded 3/8-16 (a good size for hefty pommels), and a pommel can screw right on. The tolerances on the slot need to be very tight to avoid rattling/loosening over time.
The downside of this method is that in addition to the rectangular channel for the flat of the tang, you also need a 1/2" diameter hole drilled through the grip to accommodate the steel attachment.
Additionally, unless you also drill a big hole in the swords' guard, that guard is trapped on the blade once the tang attachment is pinned in place. Now technically you can leave the pins un-peened since they are held captive in the 1/2" diameter channel of the grip. If you do that though, you probably have less resistance to lateral force put on the sword hilt. If the grip is solid polycarbonate, ABS or PETG, thats likely ok. In glued wood grips I prefer the peened pin option.
The upsides, though, is that you can screw a big pommel right on to the sword, and you don't need it slotted, etc., and you don't have to worry about having an allen wrench on hand to tighten up your sword.
The parts you see in all of the pics below (except the last one) are manufactured to my own design specifications. They are not for sale separately. In the last picture you can see the DIY version, which uses a piece of thick walled steel tube to achieve the same effect. The tube is slotted on one side and on the other its threaded to receive a piece of threaded rod.
Method #4A -- Pinned Tang Attachment + Recessed Allen Nut
The pinned tang attachment is great for pommels that can screw right on, but if you want to attach a wheel pommel, you're out of luck. However, I've modified my own tang attachments to receive a slotted pommel with a recessed nut.
Basically i've just turned the very end of the attachement down to 6x1mm and hand threaded it. The lower portion of 3/8-16 threading is ground flat on two sides to permit it to enter a rectangular slot. Viola!
Method #5 -- Pinned or Riveted Scales
This technique, if done well, produces an excellent sounding and very sturdy weapon. Since it can't be dismantled, it does make blades harder to maintain/re-polish, etc. Here, the grip, guard and pommel are held in place with a combination of epoxy and pins/rivets/bolts that pass laterally through the tang. Those pins/rivets/bolts hold everything securely in place, and the epoxy eliminates vibration. In the best case scenario, everything is rigid and the blade rings. One key to the success of this method is the epoxy. I use T-88 Epoxy by System Three.
This is a pretty simple construction format, depending on design.


